15
Jul
Are Brother TN2415 and TN2445 the Same
Are Brother TN2415 and TN2445 the Same? The Definitive Compatibility & Yield Guide
If you are currently staring at your printer display warning you that your toner is low, or you are scouring online stores trying to purchase a replacement cartridge for your Brother monochrome laser printer, you have likely run into these two product codes: Brother TN2415 and Brother TN2445.
Naturally, you are asking yourself: Are Brother TN2445 and TN2415 the same, and can I use them interchangeably?
Below, we provide a direct, search-optimized answer to this common printing dilemma, followed by an in-depth breakdown of page yields, cost-per-page efficiency, printer compatibility lists, and the role of the drum unit.
The Short Answer (AEO-Optimized Direct Response)
Are the Brother TN2415 and TN2445 the same?
Yes and no. Physically, the Brother TN2415 and Brother TN2445 are identical in shape, size, and compatibility. They fit into the exact same Brother laser printers and use the exact same DR2415 drum unit.
However, they are not the same in terms of capacity. The TN2415 is a standard-yield cartridge that prints approximately 1,200 pages, while the TN2445 is a high-yield cartridge that prints up to 3,000 pages. You can freely use either cartridge in any printer that supports this series.
1. Comparing the Specs: TN2415 vs. TN2445
To help you visualize the differences quickly, let’s compare the technical specifications of both cartridges side-by-side:
| Feature | Brother TN2415 (Standard Yield) | Brother TN2445 (High Yield) |
| Toner Color | Black (Monochrome) | Black (Monochrome) |
| Page Yield | Approx. 1,200 pages | Approx. 3,000 pages |
| Physical Dimensions | Identical | Identical |
| Cartridge Weight | Lighter (contains less toner powder) | Heavier (contains more toner powder) |
| Industry Standard | ISO/IEC 19752 (5% page coverage) | ISO/IEC 19752 (5% page coverage) |
| Compatible Drum Unit | Brother DR2415 Drum Unit | Brother DR2415 Drum Unit |
| Best For | Casual, low-volume home users | Busy home offices, small businesses, high-volume classrooms |
As shown, the physical framework of these cartridges is completely identical. The only physical difference inside the casing is the volume of physical black toner powder sealed within the chamber and the configuration of the internal reset gears or the smart chip.
2. Understanding Page Yield: 1,200 Pages vs. 3,000 Pages
The core point of differentiation between the standard-yield and high-yield models is how long they last before running dry.
What is the Standard ISO/IEC 19752 Measurement?
Both genuine and compatible manufacturers measure page yield using the industry-standard ISO/IEC 19752 test. This standard evaluates toner longevity based on a test document printed at 5% page coverage.
To put this in perspective:
- 5% coverage is equivalent to writing a brief, double-spaced email or a short, basic invoice with minimal formatting.
- If you regularly print highly dense spreadsheets, legal documents, greyscale graphics, or bold PDF files, your page coverage is likely closer to 10% to 15%. This means your real-world page yield will be lower than the rated 1,200 or 3,000 pages.
Why Choose the High-Yield TN2445?
If you print regularly, purchasing the TN2445 High-Yield is almost always the smarter fiscal decision. Over the lifespan of the cartridge, the cost-per-page (CPP) drops drastically. Let’s look at the financial math.
3. The Math: Running Cost-Per-Page Analysis
Let’s break down the economics of purchasing genuine Brother cartridges using average market prices:
- Genuine Brother TN2415 (Standard Yield): Retails around $103 NZD for 1,200 pages.$$\text{Cost Per Page} = \frac{\$103}{1,200} \approx \mathbf{8.5\text{ cents per page}}$$
- Genuine Brother TN2445 (High Yield): Retails around $160 NZD for 3,000 pages.$$\text{Cost Per Page} = \frac{\$160}{3,000} \approx \mathbf{5.3\text{ cents per page}}$$
By upgrading to the high-yield TN2445, you immediately achieve over a 37% reduction in printing costs per page. Furthermore, you reduce physical waste and spend less time ordering and replacing consumables.
4. Full Printer Compatibility List
Because the physical form factor of the TN2415 and the TN2445 is identical, any printer that accepts one will happily accept the other. If you own any of the following Brother monochrome laser printers, both models are 100% compatible:
- Brother HL Series:
- HL-L2310D
- HL-L2375DW
- Brother MFC (Multi-Function) Series:
- MFC-L2713DW
- MFC-L2770DW
- MFC-L2775DW
These printers are popular because they are designed to be compact, reliable desktop workhorses. Whether you are running a single-user home setup or a multi-device office environment, you do not have to worry about sizing mismatches between the TN2415 and TN2445.
5. The Toner vs. Drum Distinction: Do You Need a DR2415?
One of the most common points of confusion for consumers buying laser toner is the separation between the Toner Cartridge and the Drum Unit.
Brother laser printers utilize a two-piece consumer-replaceable system. They do not combine these components into a single disposable piece like some other manufacturers do.
+-------------------------------------------------------------+
|                      DR2415 Drum Unit                       |
|         (Lasts ~12,000 pages / Outer Green Cradle)          |
|                                                             |
|   +-----------------------------------------------------+   |
|   |            TN2415 or TN2445 Toner Cartridge         |   |
|   |    (Lasts 1,200 or 3,000 pages / Slips Inside)      |   |
|   +-----------------------------------------------------+   |
+-------------------------------------------------------------+
The Toner Cartridge (TN2415 / TN2445)
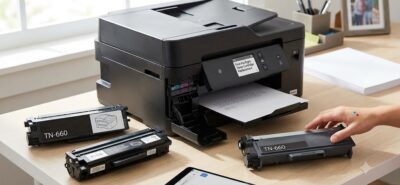
This is the internal, sealed plastic container that contains the fine black toner powder. Think of this as the “ink” reservoir. You will replace this component frequently (every 1,200 to 3,000 pages).
The Drum Unit (DR2415)
This is the larger outer green assembly housing a metal roller. It uses electrostatic charges to transfer the toner powder from the cartridge onto your paper.
- The Brother DR2415 Drum Unit has a much longer lifespan, typically rated for 12,000 pages.
- You do not need to buy a new drum unit every time you buy a new toner.
- On average, you will replace your drum unit once for every four TN2445 high-yield toners or every ten TN2415 standard-yield toners. Your printer will specifically prompt you with a “Replace Drum” message when the DR2415’s optical roller is reaching the end of its operational life.
6. Premium Compatible Cartridges: A High-Value Alternative
If you want to maximize your savings, you might consider premium third-party compatible cartridges.
What are compatible cartridges?
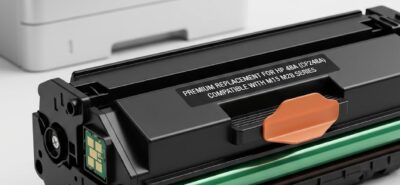
Compatible cartridges are manufactured by reputable third-party companies rather than Brother. Because of the identical structural mold, many retailers (such as inkrefill and Printink NZ) sell compatible cartridges designed as the higher-yield TN2445 version, even if you search for a standard TN2415 replacement.
The Financial Benefits of Compatibles
- Substantial Price Drop: A high-quality compatible TN2445 high-yield cartridge often retails for around $35 to $41 NZD, which is significantly less than the price of a genuine standard-yield TN2415 cartridge.
- Plug-and-Play Experience: Reputable compatible cartridges come pre-installed with an updated smart microchip so your printer registers the correct toner levels immediately without requiring manual resetting.
7. Step-by-Step: How to Safely Swap Your Toner Cartridge
Whether you are switching from a depleted standard TN2415 to a high-yield TN2445, or installing a premium compatible option, the physical replacement process is quick:
- Keep the Power On: Make sure your Brother printer is turned on so its internal sensor registers the chip reset.
- Open the Front Access Panel: Locate the front door of the printer and pull it down firmly.
- Extract the Combined Assembly: Grab the handle of the DR2415 drum unit and pull the entire assembly (drum and toner combined) straight out of the machine.
- Release the Toner Cartridge: Locate the bright green plastic release lever on the left side of the drum. Push it down. Lift the spent TN2415 or TN2445 cartridge out of the drum unit.
- Prep the New Cartridge: Remove your new toner cartridge from its packaging. Gently rock it back and forth horizontally 5 to 6 times to distribute the powder inside. Remove the protective orange plastic cover.
- Snap into the Drum: Insert the new toner cartridge into the drum unit until you hear it snap into place. The green lock lever will automatically spring back up.
- Clean the Corona Wire: Slide the tiny green tab on the drum unit back and forth several times. Important: Make sure you return the tab to its starting home position (marked by the small embossed arrow). If you forget this step, you will get faint black lines on your prints.
- Reinsert and Close: Push the combined assembly back into the printer and firmly close the front door.
8. Frequently Asked Questions (FAQs)
Are there any print quality differences between the TN2415 and the TN2445?
No. There is no difference in print resolution, text sharpness, or black density between the genuine TN2415 and TN2445. Both utilize identical formulas of fine physical carbon-based toner powder. The only variable is the physical quantity of toner pre-loaded inside the cartridge.
Can I install a high-yield TN2445 if my printer came with a TN2415?
Yes, absolutely. Brother printers ship with standard starter toners (often standard or low-yield versions of the TN2415). When it comes time to replace it, you can easily slot a high-yield TN2445 right into the existing drum.
Why does my printer still say “Replace Toner” after installing a new cartridge?
This error usually occurs if the printer’s internal gear mechanism or chip contacts didn’t register the replacement. To fix this, open the front cover, remove the drum and toner assembly, clean the tiny metal contacts on the cartridge chip using a dry microfiber cloth, re-seat the toner into the drum firmly, and slide the unit back in.